Pipedream
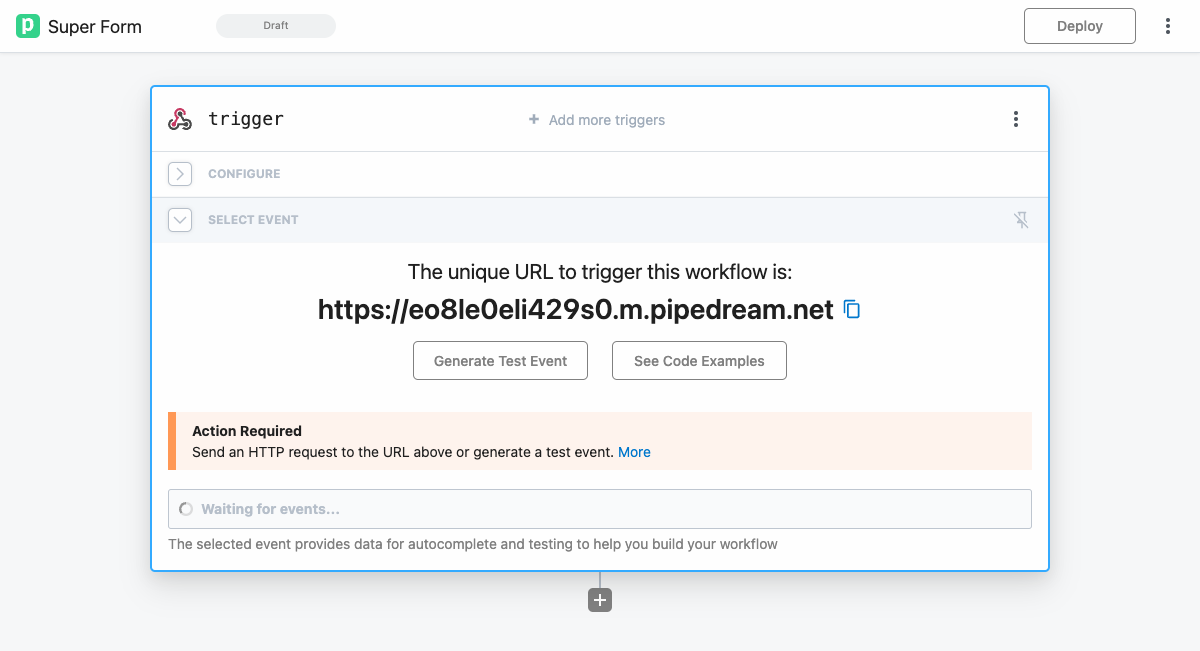
To get the submission working, we have to set up Pipedream. Create a new Workflow and choose "HTTP/Webhook" then "HTTP Requests". Confirm the Trigger with "Save and continue" and copy the unique URL, and paste it into your Module configuration.

Choose "HTTP/Webhook"
Copy the unique URL and paste it into the HubSpot Module
First Submit
To get the actual form working, you need a NodeJS script for it. We did build a generator for that purpose. After you finish the form and hit submit, the Webhook in Pipedream will be triggered, and an event will become visible. Copy the whole "Body Value" and go to our NodeJS Converter.
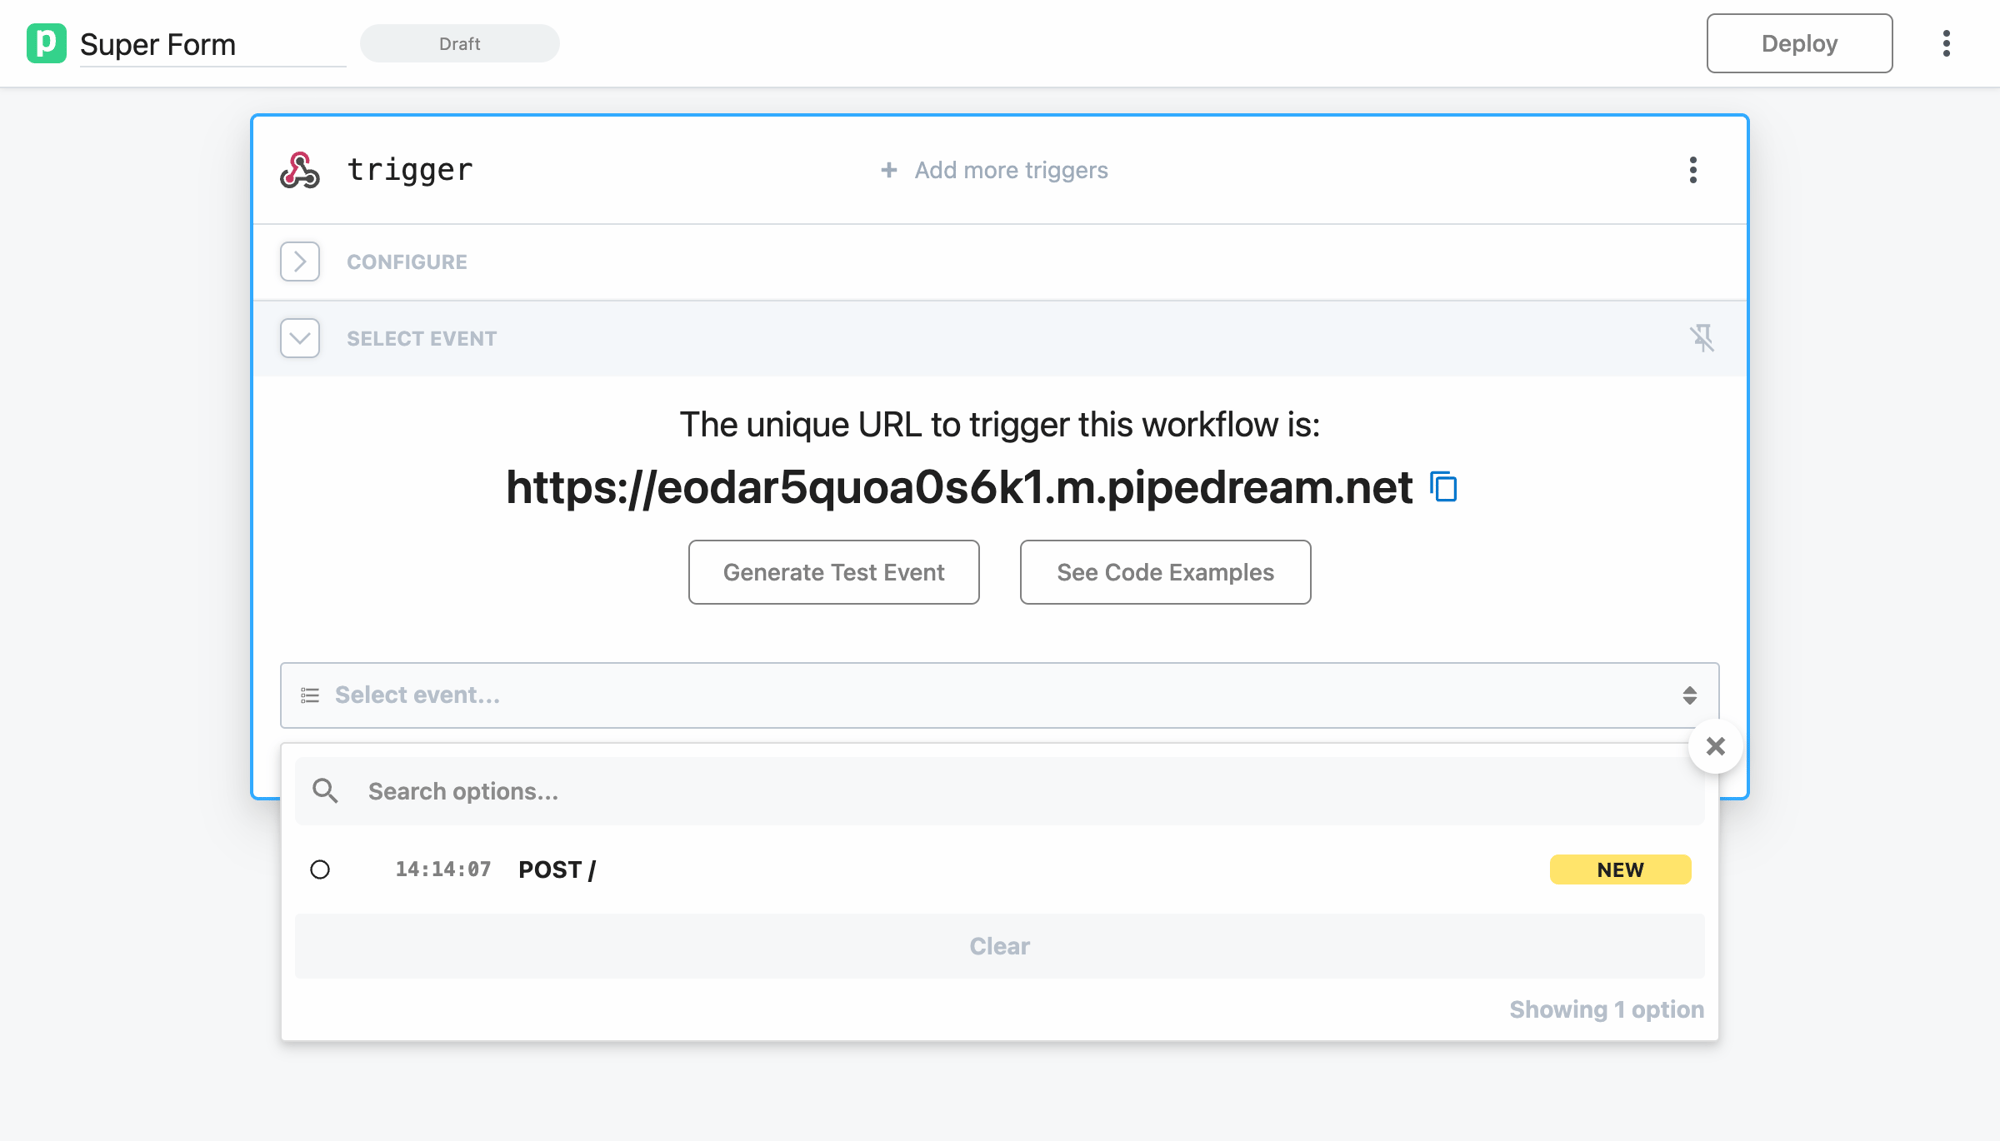
Wait for the Submit to appear
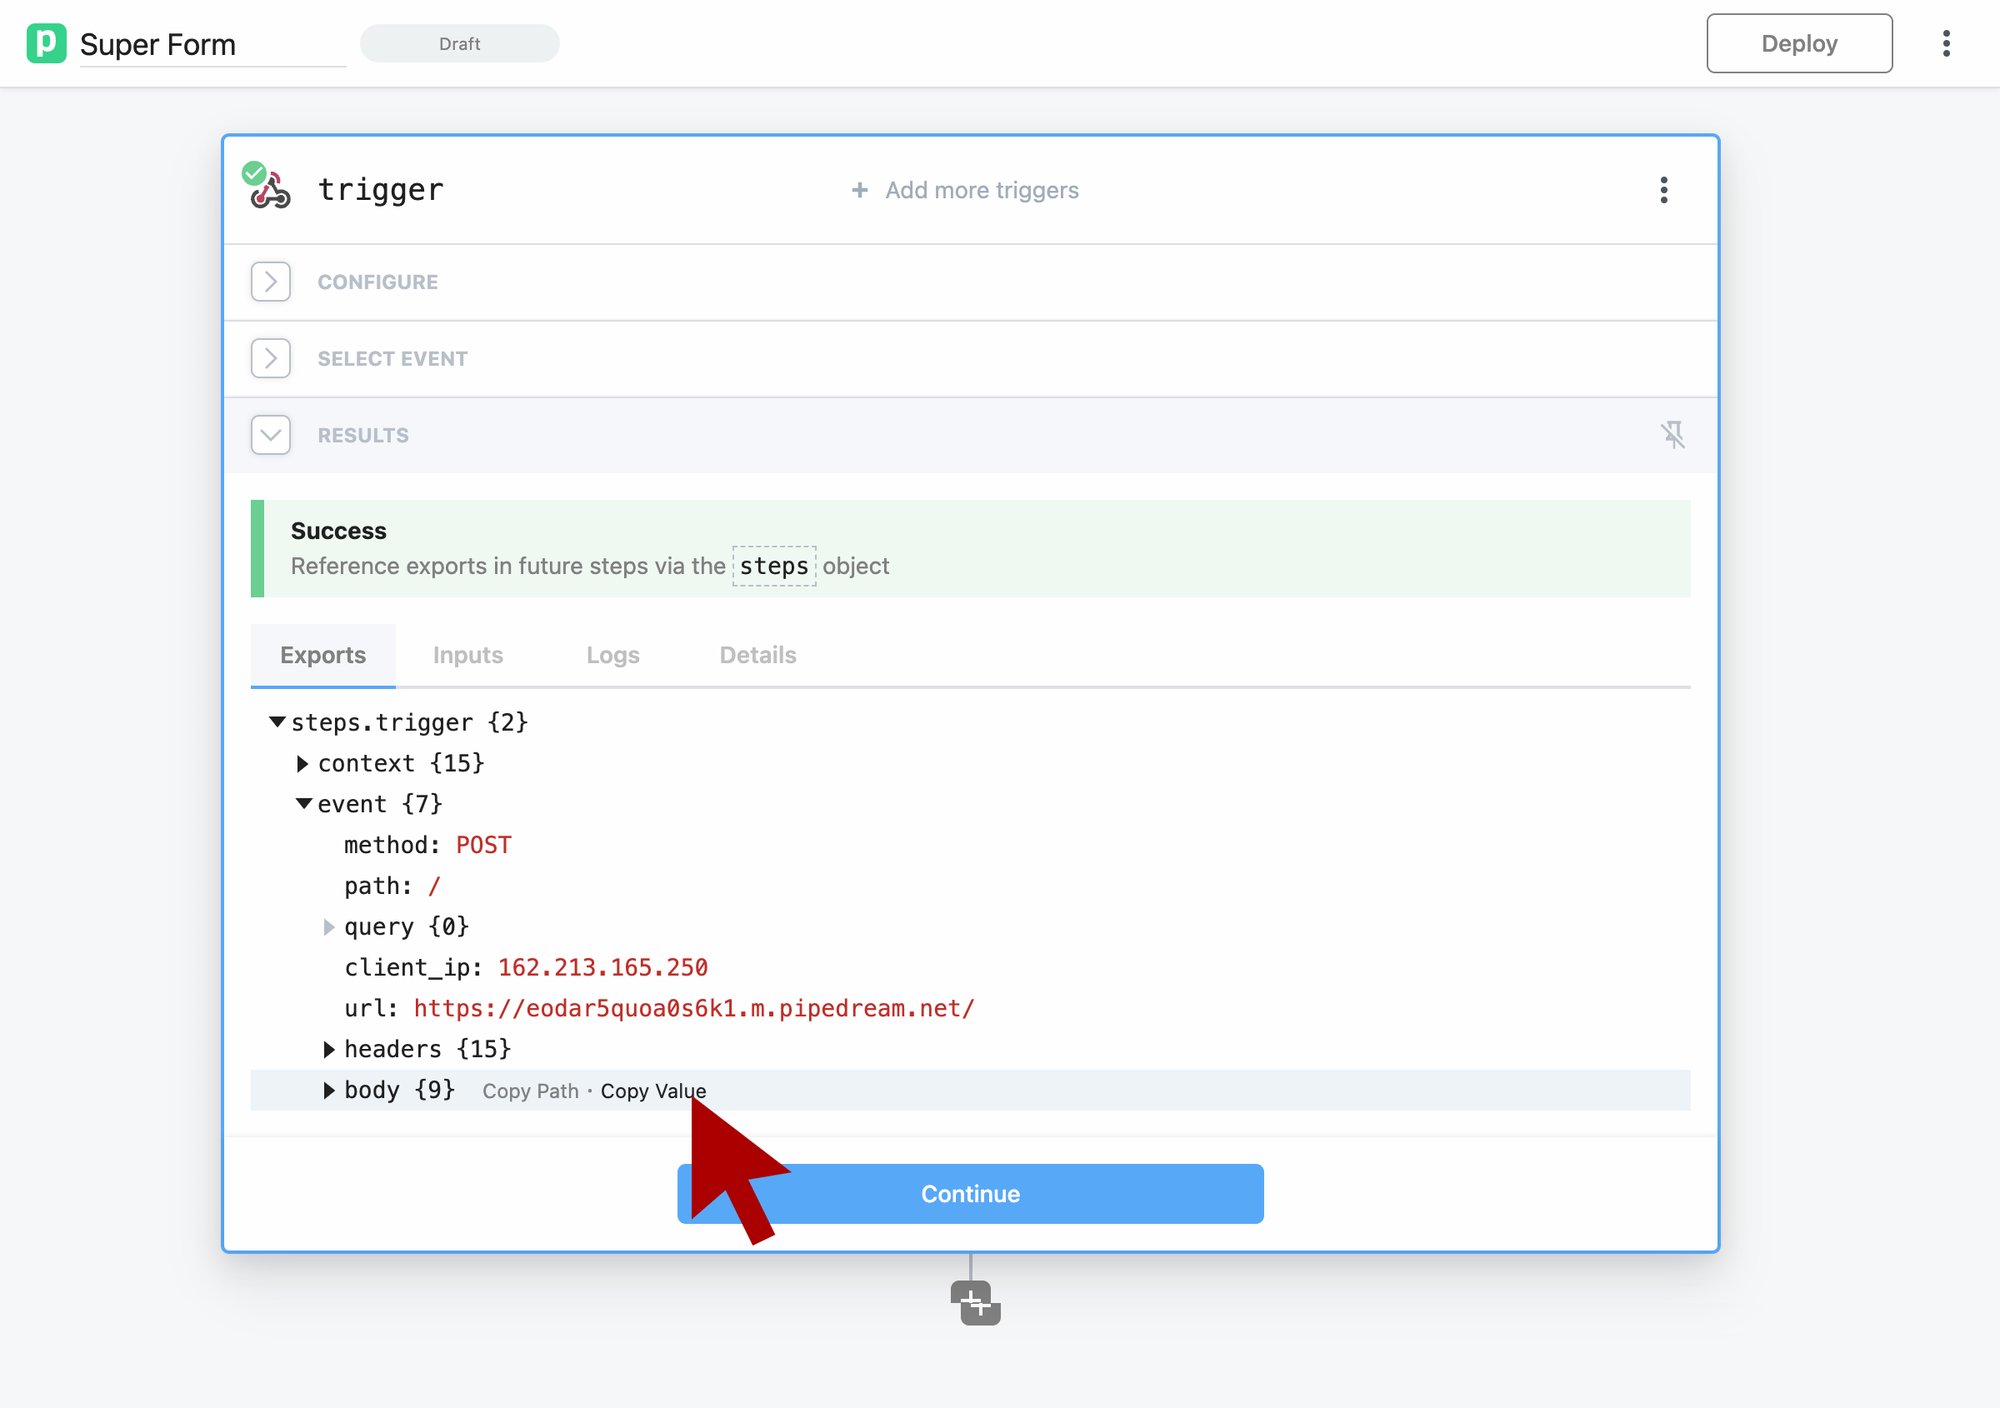
Copy the Body Value
Create the NodeJS
Paste the "Body Value" and name the element. The "Header" will be the title for either the Note or the Meeting. You have the chance to choose between these two types. Hit "Convert JSON" and copy the generated code. Go back to Pipedream and paste the code into a second step. As a second step, use a node element (Hello World, for instance, and replace the whole code). Paste your API token from the first step where the screenshot shows "Baerer pat-XXX". As you see, your API token is NEVER shared with anyone else except you.
After you're done, hit "Test" and look at the Activity Flow of your Contact in HubSpot. If there is an Error you will see it in Pipedream above the Buttons "Test" and "Deploy." If you have changes, remember to regenerate the code at the NodeJS Converter before deploying the code.
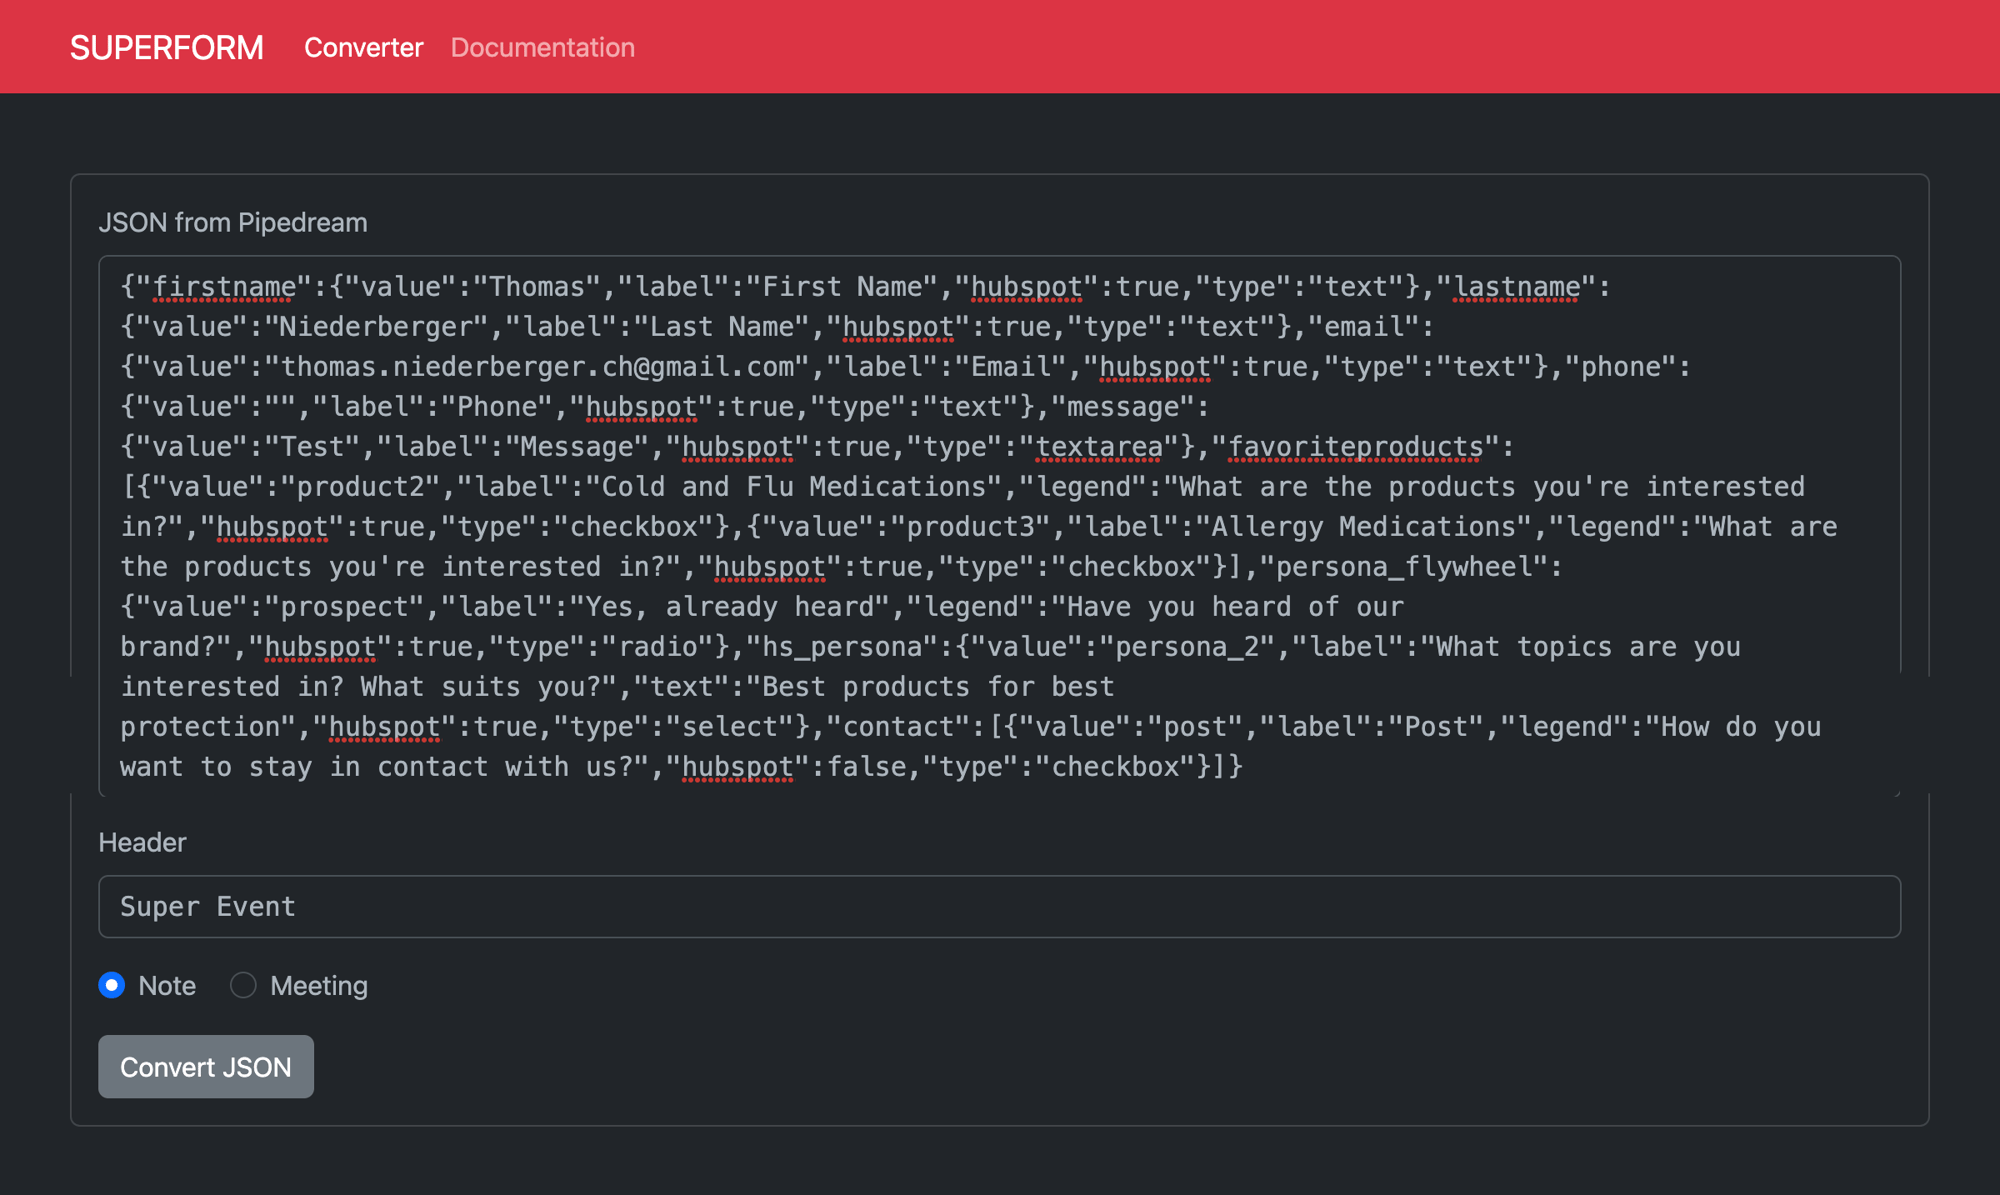
Paste the JSON from Pipedream into the Converter
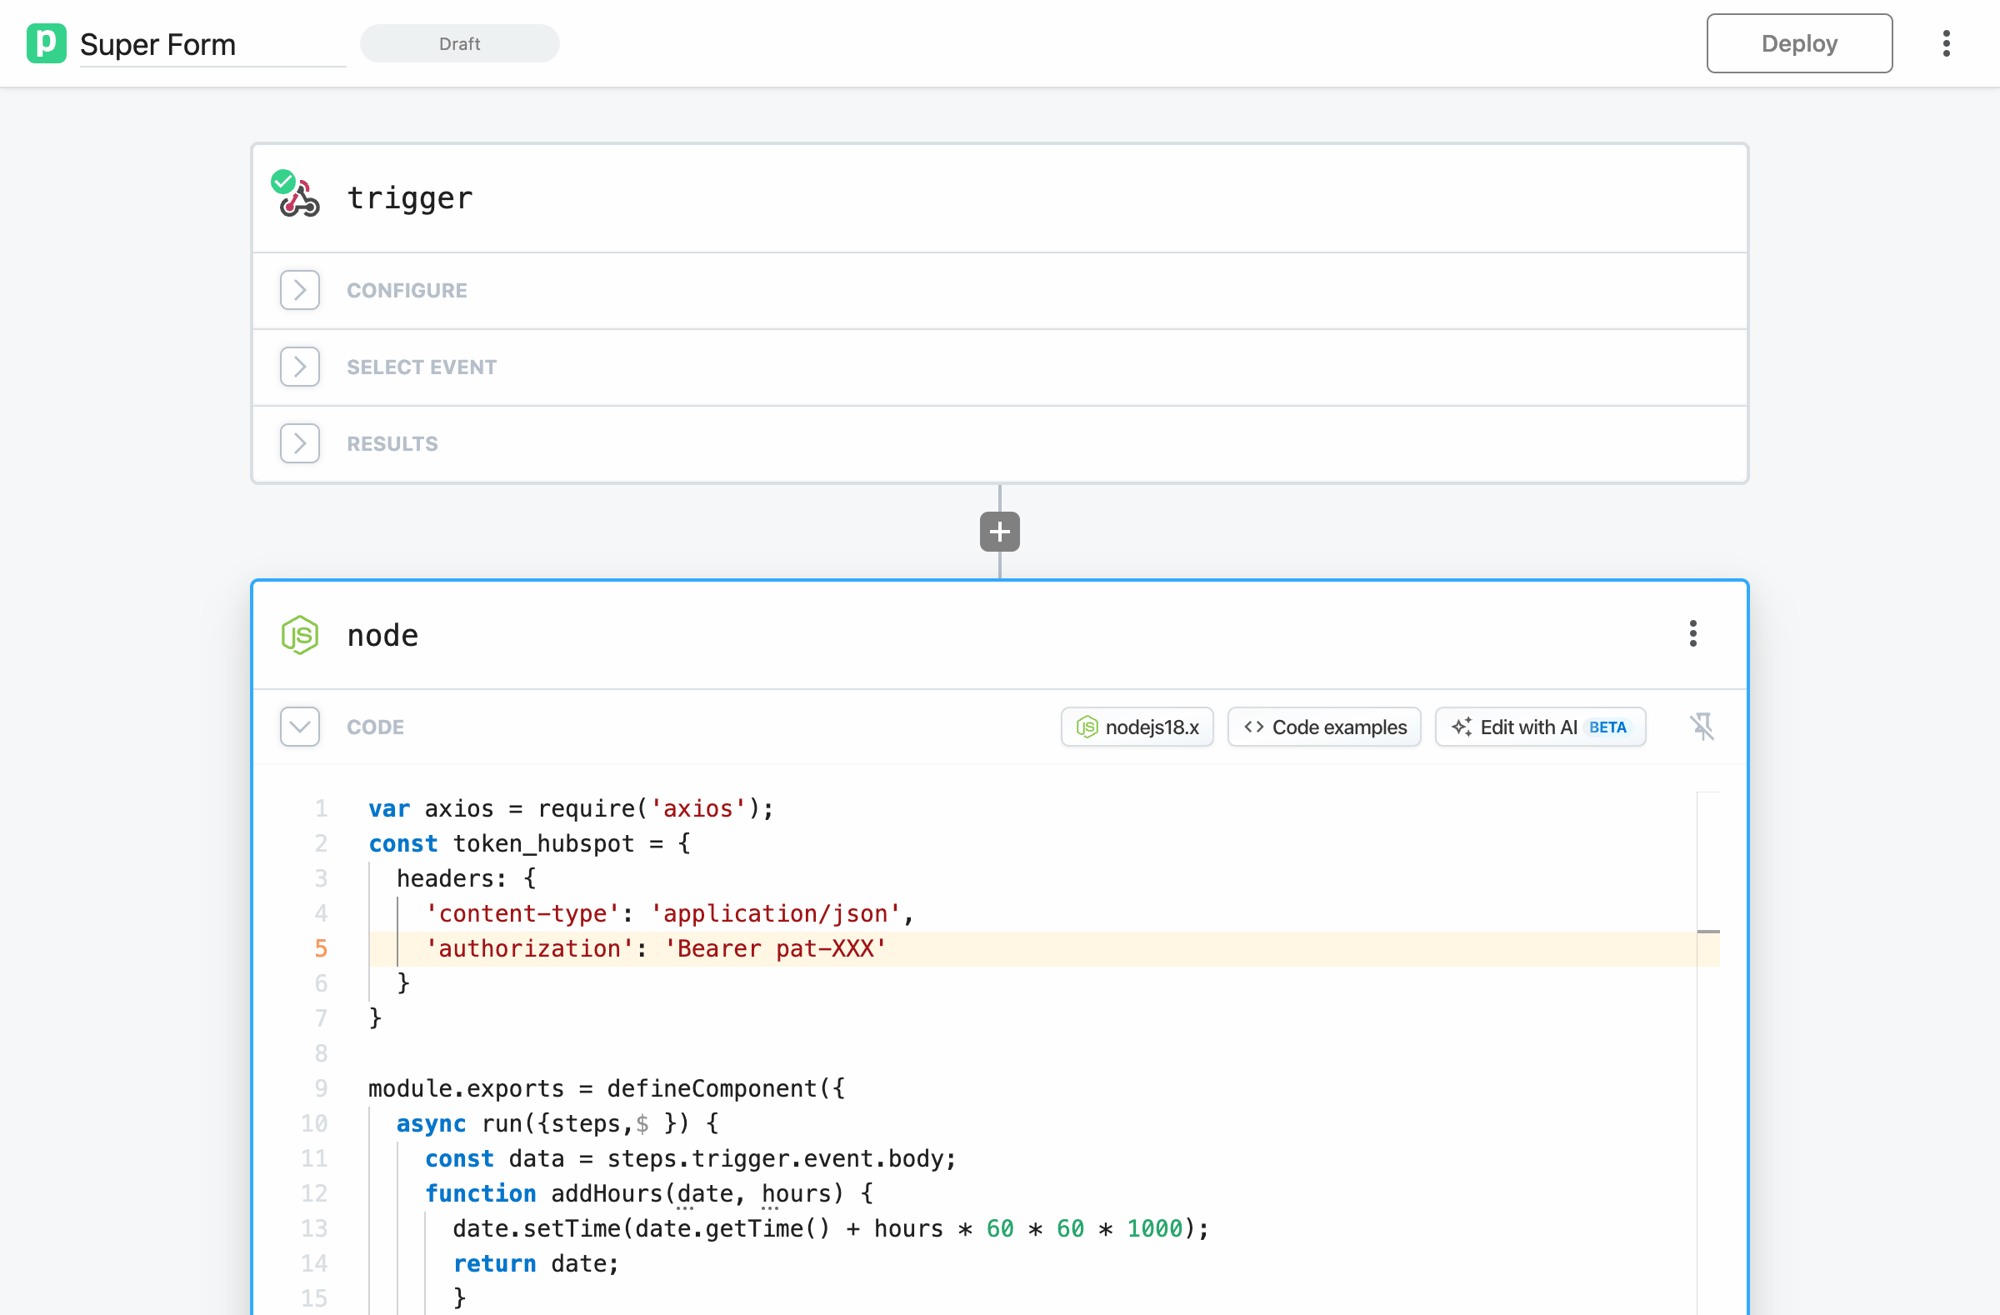
Place the Code into a new Node step, and don't forget to replace the API token

That's how it looks when it worked.
Errors
We know that a few steps are necessary for a great result and that there could be Errors in setting everything up. Look at the Error log in Pipedream; it will tell you what's wrong. The following are common mistakes in the Configuration:
- A Property is used that does not exist or has a bad name
- The API token is wrong or not set
- The Form got changed, but the NodeJS code was not adapted
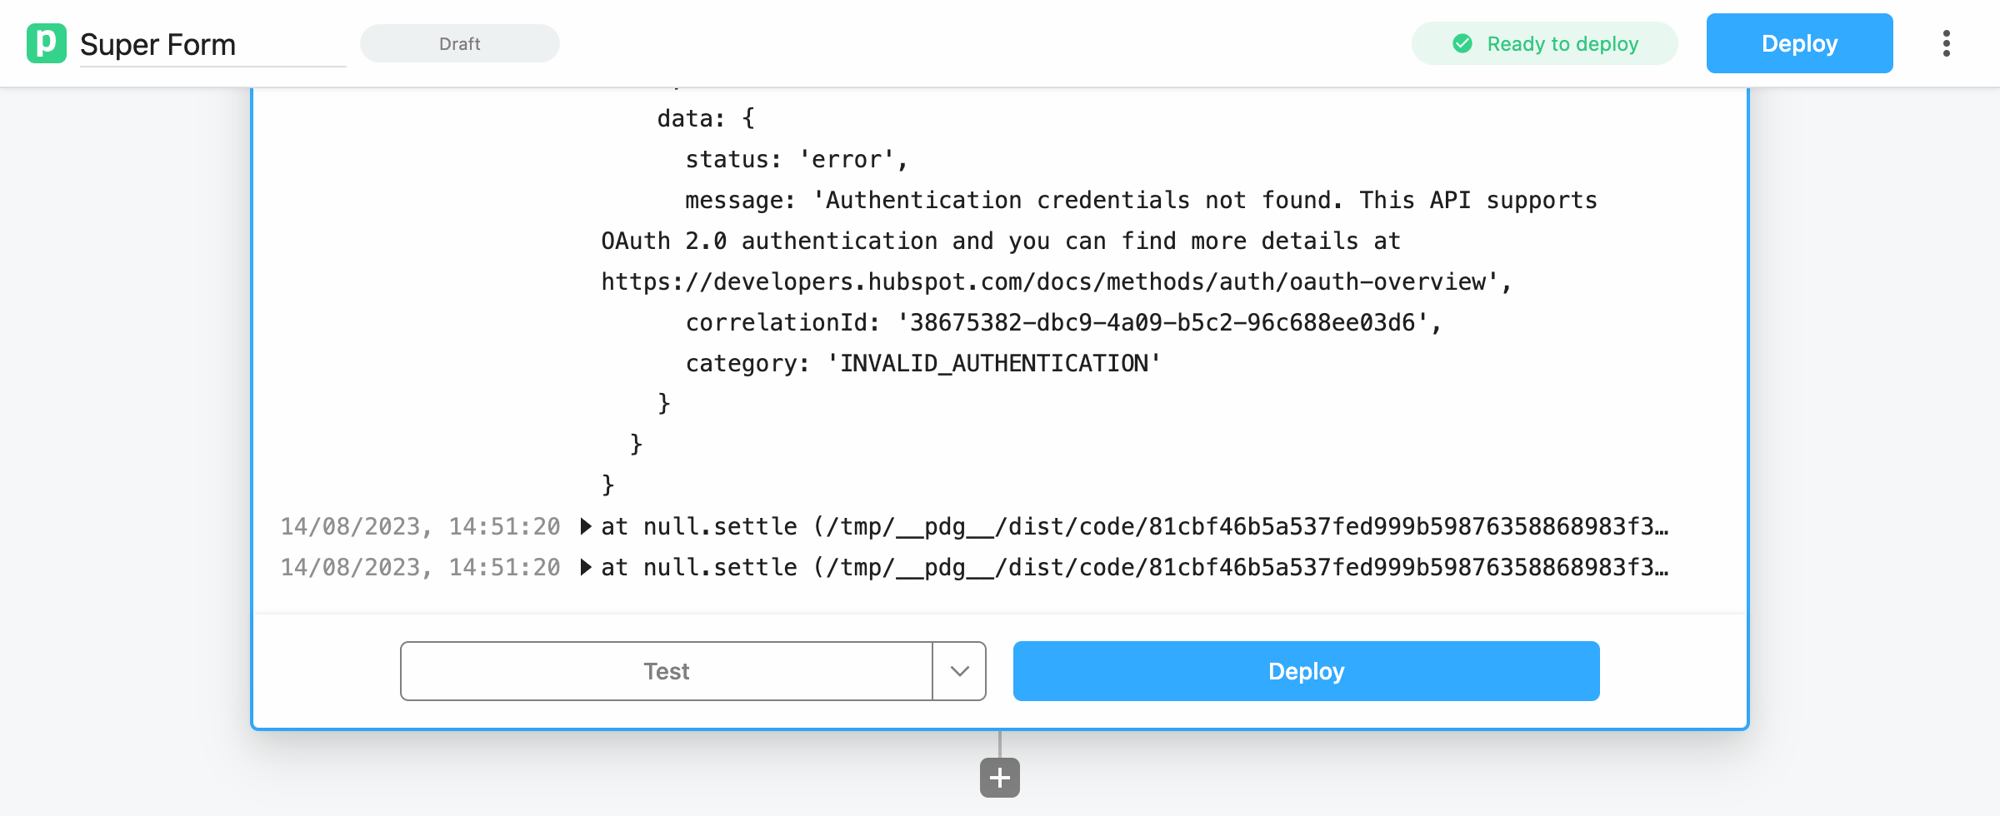
Expand the Error message and look for the issue. It's usually at the bottom.
